If you’ve recently bought an iPad and now use it for everything, you probably have run into a case where you’ve needed to take a screenshot. You can do that on any iPad, but the steps are different depending on the model you have. If your iPad has a home button (or not), there are a couple of tricks to remember for taking screenshots. If you have an Apple Pencil, it’s easy to take a screenshot with it and quickly edit the image — and there’s even a virtual home button that can help you, too. Here are all of the ways you can take a screenshot on an iPad.
How to take a screenshot on an iPad without a home button
Like the latest iPhones, most of the newest iPad models like the iPad mini don’t have a home button. So how do you take a screenshot? You can still use the physical buttons on the iPad to do this: press the power button and either of the volume buttons at the same time. The screen will flash and a preview of the screenshot will appear in the bottom left corner of the screen.
To edit the image, tap on the preview and work from there. Otherwise, you can find the screenshot in your Photos app.
How to take a screenshot with a home button
Older iPads come with a physical home button, so taking a screenshot on these devices is a little different. Press the power and home buttons at the same time, the screen will flash and the screenshot will appear in your Photos app.
How to take a screenshot with AssistiveTouch
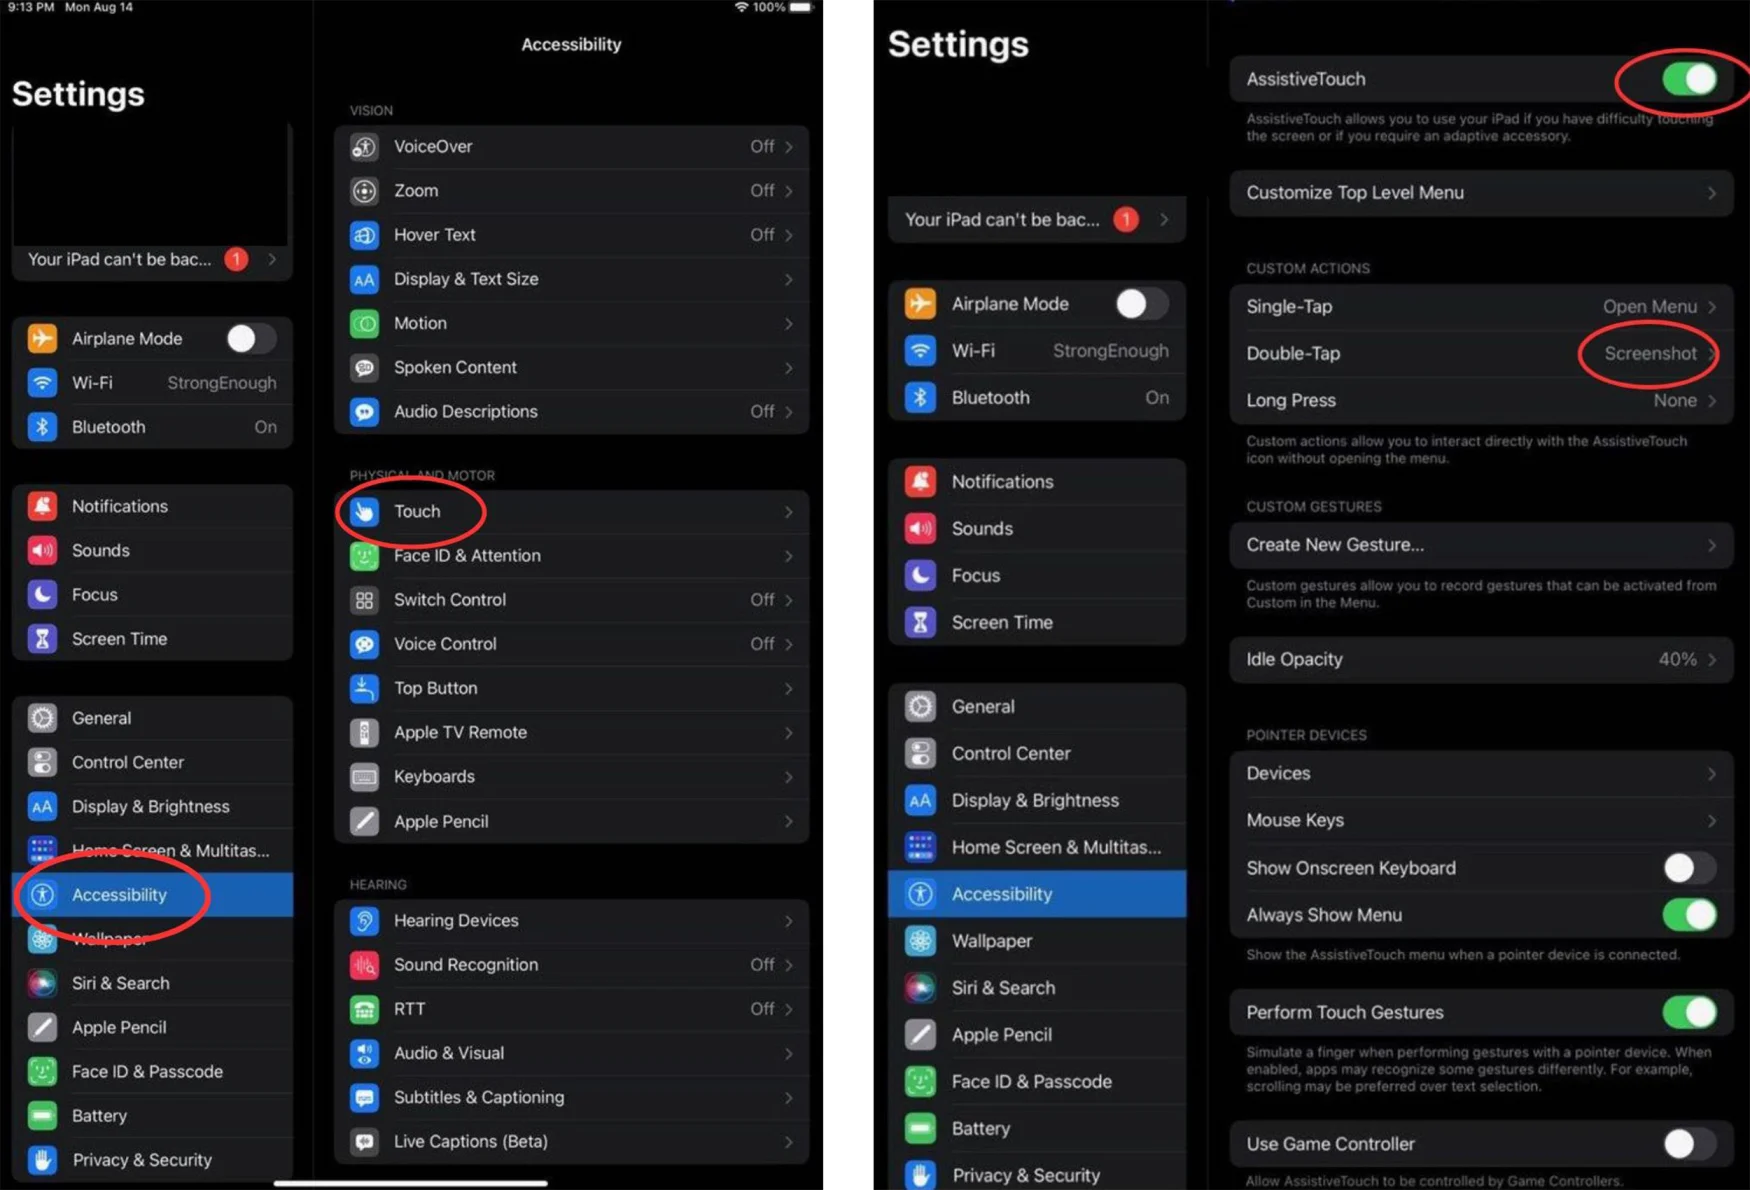
There’s also a way to take a screenshot on an iPad without using any buttons. Go into Settings > Accessibility > Touch and turn Assistive Touch on. Click on Double Tap and customize that setting to take a screenshot. A virtual home button will then appear on the right side of your screen. Quickly tap that button twice to take a screenshot.

Photo by Julia Mercado / Engadget
A bonus for Apple Pencil users
With an Apple Pencil, swipe up from the bottom left corner of your screen to take a screenshot. An editing menu will open automatically and from there, you can annotate and mark up the image with the Pencil using several brush options. Tap Done and Save to finish editing.
Credit: Source link


